Bauer C 1 M Super
| Bauer C 1 M Super | |
|---|---|

| |
| Bauer C 1 M Super | |
| Specifications | |
| Model | Bauer C 1 M Super |
| Format(s) | Super8 |
| Manufacturer | Bauer |
| Made in | Germany |
| Produced | 1968-71 |
| Lens(es) | 1,8 / 9 - 36 mm |
| Zoom | Auto/Manual |
| Macro | please add |
| Frame rates | 18, 24 + single frame |
| Exposure | Automatic |
| Focus | Aerial |
| Film speeds (ASA/ISO) | please add |
| Shutter degree | please add |
| Sound (striped) | No |
| Sound (two-band) | No |
| Sound (optical) | No |
| Weight | please add |
| Dimensions | please add |
| Power supply | 3 AA batteries |
| Original price ($US) | please add |
| Original price (£) | please add |
| Original price (DM) | 498 DM |
| Original price (Yen) | please add |
| Recent prices on eBay ($US) | $81 (07/1999) $61 (08/1999) |
| Recent prices on eBay (£) | please add |
| Recent prices on eBay (€) | please add |
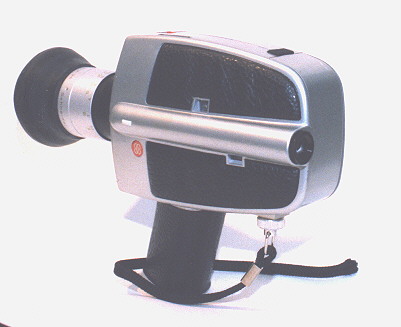
(TBD: move image to infobox on the right as soon as uploaded to Super8wiki)
Contents
Note[edit]
The camera was sold in two different versions: One version was only for Western Germany and was sold with a Schneider-Kreuznach Variogon 1,8 / 9 - 36 mm. The other one was sold in all other markets, e.g. Italy, with a Schneider-Kreuznach Cinevar 1,8 / 9 - 36 mm. The only obvious difference is that the Variogon is bulkier/larger. For details and photos please go to this thread.
Comments[edit]
Directly from the BAUER C1M Super Manual (missing page 1 with figures):
Batteries
three 1.5-volt penlight batteries. size AA (we recommend Mallory Mn 1500), energize the light regulator, the power zoom and the electric motor for the film transport. Unlock the battery housing cover (15) with the aid of a coin; insert the batteries into the handgrip (14) in such a manner (see fig A) that the positive and the negative pole ends meet the symbols in the battery housing. For checking the energy of the batteries there is a green signal light at the right side of the viewfinder image (fig D). This ligits only at a running speed 18 f.p.s. Once this signal right starts flickering it will soon be time to replace the batteries. a time this green light dims out carpletely it is necessary to put in new batteries One
set of batteries will run through about 10 cartridges.
Film The BAUER C1M uses standard super 8 cartridges (available in black and white and in color) provided the film speed is 40 or 160 ASA. Depress key (8), open the cover (9), and slide the film cartridge into the cartridge chamber (fig. B); close cover (9). The inserted cartridge automatically sets the fiim speed to 40 or 160 ASA according to the type of film loaded. The film-type indicator window (2) shows with what type of film the camera is loaded. The camera is ready for daylight shooting immedjately upon loading Artificial light: When shooting in artificial light, mount a movielight to the camera. If this movielight is fitted with a filter key, it is mounted right into the slot (7) provided in the top of the camera (see fig. F). This mounting key automatically swings the daylight filter out of the optical path of the lens. If an off-camera movielight is used, slide the filter key supplied. into the slot in the top of the camera (but make sure to take out the key for daylight shooting). Shooting on black and white film For shooting black and white film. manufacturers recommend to swing out the daylight conversion filter; for this purpose push the filter-actuating key supplied (or the key of the movielight) into the mounting slot (7) in the top of the camera. According to our experience however, it obviously does not matter whether the filter is in or out for black and white film
Film footage counter, film run control A super 8 cartridge contains 50 feet of film. This gives you a shooting length (or screen time) of about three and a half minutes (at a running speed of 18 frames per second). The footage counter (10) is automatically touched off when a cartridge is dropped into the camera: this counter shows how many feet are yet to exposed. The end of the film is signaled by the '0' position of the counter; it is also acoustically indicated by a change in the running sound. The counter resets itself automatically when the cartridge is removed The end of the film is clearly marked 'exposed'. If the film run control disc (visible in the film run control window (11) should not move during shooting, this indicates some trouble in the cartridge, In such a case take out the cartridge and push the film a little bit ahead, just by a few perforations; then re-insert the cartridge. This helps in most cases. But memorize or not the position of the footage counter. (10) before removing the cartridge because counter will snap back to its starting position at 50 feet when the cartridge is removed.
Film runing speed switch( 16) provides 18 or 24 fps. For 18 fps push the switch to the left for 24 f.p.s. to he right. You will shoot most of your films at 18 fps. At a speed of 18 fps the camera exposes the film 18 times per second and advances the film 18 times in a second. The film runs thought the projector at the same speed. This guarantees perfectly natural movements. The speed of 18 fps is generally accepted as the normal filming speed.
preferably use 24fps, for all those shots where camera shake is likely to come in. i.e for panning, for sport, events, for shooting out fo the car window, etc. For animation shots the BAUER C1 M is fitted with a single frame exposure arrangement. For such shots screw a cable release into the socket (12): each time you press the plunger the saucer exposes one single frame. With this device it is possible to make fast-motion shots and to lend life to inanimate objects by moving the object between each single frame exposure. This shooting method which is called animation, is especially useful for titling
Reflex viewfinder, focusing The C 1M is equipped with a through-the-lens reflex viewfinder which is without parallax. Adjust the eyepiece (I) to suit your eyesight as follows: Set the distance scale (5) to ♾️ (infinity) and the zoom lever (4) to the longest focal length (36 mm). Then view a subject which is at least 160 feet away and adjust the eyepiece (1) by turning it to the left and to the right until the point of maximum shapness position. The adjusting range of the eyepiece extends from -5 to +5 diopters The distance is set with the aid of the distance setting ring (5) (fig. C). For scenes closer than 5 feet use any of the conventional close-up lenses with screw-in mount (43 x 0.75); set the distance according to the table which comes with the close-up lens.
Zoom lens; light regulator Frame your subject by actuating the zoom lever (4). Of course you may also vary the focal length during shooting for what is called a zoom effect. For the sake of smoothness, such zooming should be done with the aid of the power zoom arrangement: Slide the switch upward (for telephoto long shots) or downward (for wideangle shots). The BAUER behind-the-lens light regulator will automatically control the exposure through the zoom lens. This light regulator also controls the exposure automatically at the various running speeds. A small coloured f/stop scale low down in the viewfinder serves as functional control (see fig. D) of the light meter; with the f/stop indicator in the yellow section you may safely shoot; at the point where the yellow changes to red (lens wide open at f/1.8) the light regulator indicates that the light may no longer be sufficient for filming. This red / yellow underexposure warning signal may however be disregarded when shooting with a movielight (such as the BAUER Filmsonne 650) at any distance up to 13 feet even if the signal turns red. In very bright light (f/stop indicator at f/16) it is advisable to use a neutral density filter (screw in type, 43 × 0.75 mm). The colour signal changes in width according to the lighting conditions: The yellow area is smallest at the smallest lens opening (f/16) Whenever Whenever you aim your C 1 M at a scene the fully-automatic behind-the-lens light regulator instantly sets the correct lens opening. Only in very rare cases it will be necessary to override the automatic setting with the buil in f stop fixing device (6). If vou take a scene out of a tunnel for instance, we advise you to proceed as follows: Before entering the tunnel. lock the diaphragm by depressing the key (6)until you come out of the tunnel and the brightly illuminated landscape will be exposed. Make sure, however, that you keep pressing the key! to the very end of the scene
The BAUER light regulator
is adjusted to the camera lens to ensure the best exposure results. It is for this reason that we advise you not to determine the f stop with the aid of any other light meter.
Hints for shooting For filming hold the camera in the position shown in fig. E Press the release (13) and the film will start running. Hold the camera real steady during shooting! The length of an average scene is about six seconds. Your movies will be more entertaining if you change your shooting point quite frequently. Do as little panning and zooming as possible. For shooting from a tripod (particularly advisable for telephoto shots) the camera is fitted with a tripod. thread 1. cartridge, In such a case take out the cartridae and buds no film a fitle bit ahead, iust by a few perforations; then re insert the cartridge. This helps in most cases. But memorize or sole the position of the footage counter. 00) before removing the cartridae because cer will snap. back to its starting position at 50 feet when the cartridge is removed
Maintenance and care Make sure to protect your camera from sand, water, excessive sun irradiation, as well as from heavy shocks: Maintenance and care of the eamera can be limited to the outsid mechanical and optical elements. Preferably use a fine camel's hairbrush or special len tissue for cleaning the camera lens. Make sure not to touch the front element of the zoom lens! There is easy access to the film gate through the cartridge chamber (just open cover 9). The film gate may be cleaned with a brush. If you should ever be in doubt about the functioning of your camera, see a camera dealer or get in touch with your nearest BAUER service station.
Reviews[edit]
eBay Auctions[edit]