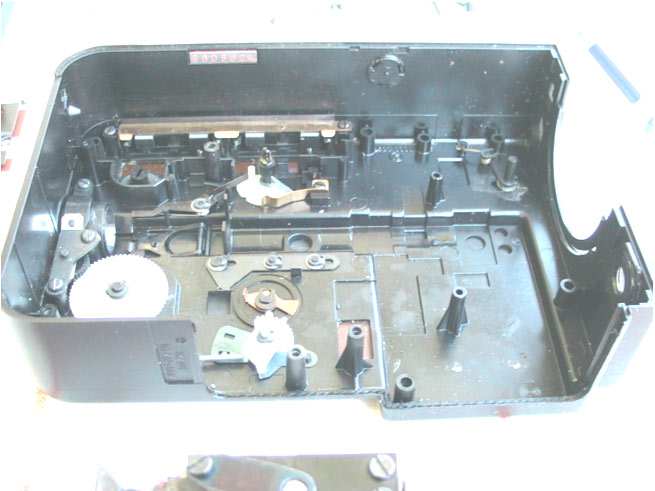
Eumig 880 PMA repair: how to disassemble
Here are instructions on how to dissasemble and service the Eumig 880 PMA Super 8 movie camera. These are reproduced here with permission of Rollef from the filmshooting.com forums.
WARNING, This camera is difficult to put back together due to the many buttons and knobs, aka filming options this camera provides. While you may feel you are having success as you take the camera apart, be aware that at some point while taking apart the camera you will probably no longer recognize nor remember what position the various switches and dials were orginally in and therefore you probably won't know how to line everything up when it's time to put the camera back together again.
It may be wise to take side by side pictures of ALL the outside knobs and switches and as you take apart a section of the camera you then take a picture of the same lever and how it resides INSIDE the camera. I would NOT recommend taking this camera apart if you are not an experienced technician.
However, these cameras do require periodic lubing of the exposure meter and the camera motor so it is also not wise to run the camera if the motor is making lots of noise.
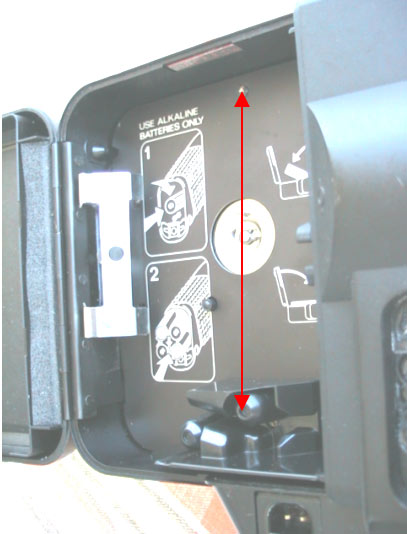
1.Unscrew film leader for sound film cassette and text plate from the film compartment.
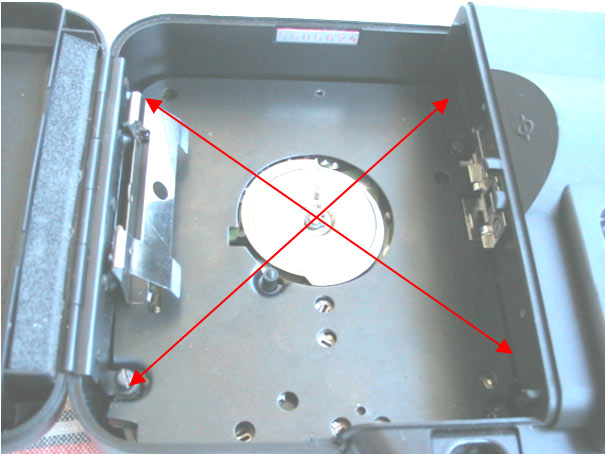
2. Remove door and metal plate and plastic sheeting under the metal plate
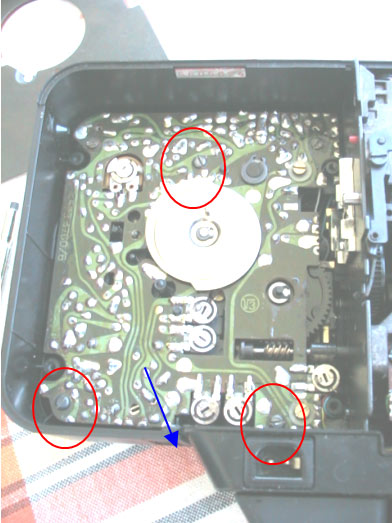
3. This is what you are left with. Unscrew the tree marked screws, and one holding the pistol grip to the cassette section (blue arrow)
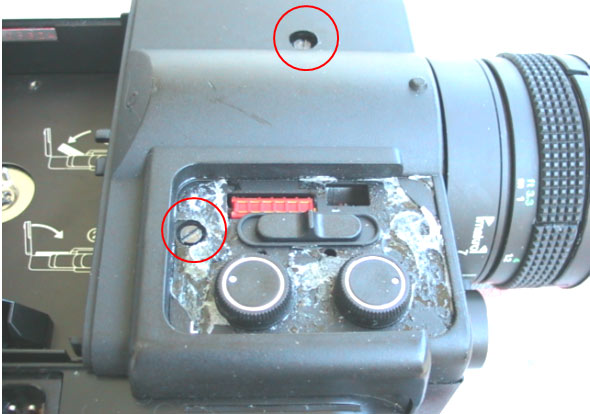
4. On the lens section unscrew two screws.
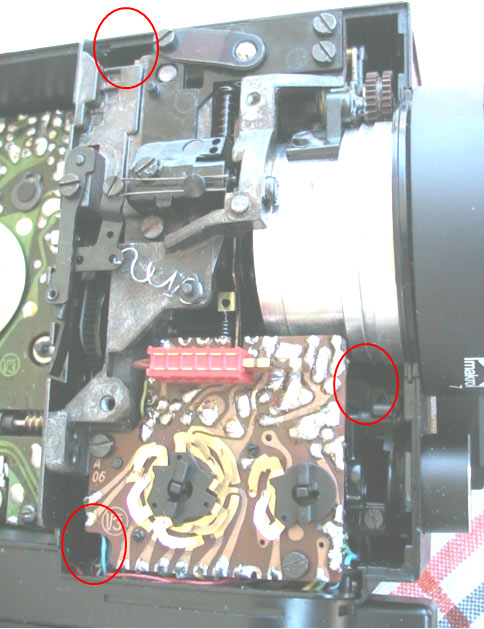
5. There are now three screws to remove in the ”deep” of the camera. When this is done you are supposed to be able to wiggle the camera (gently), holding the pistol grip, out of the exterior.
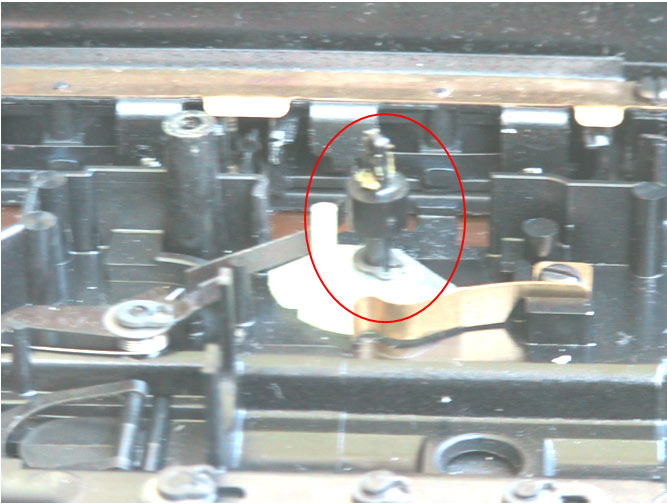
7. Detail from exterior. This is the pin connected to the auto/manual exposure button. On my camera the pin broke off (fixable with glue) and the camera was stuck on auto exposure.
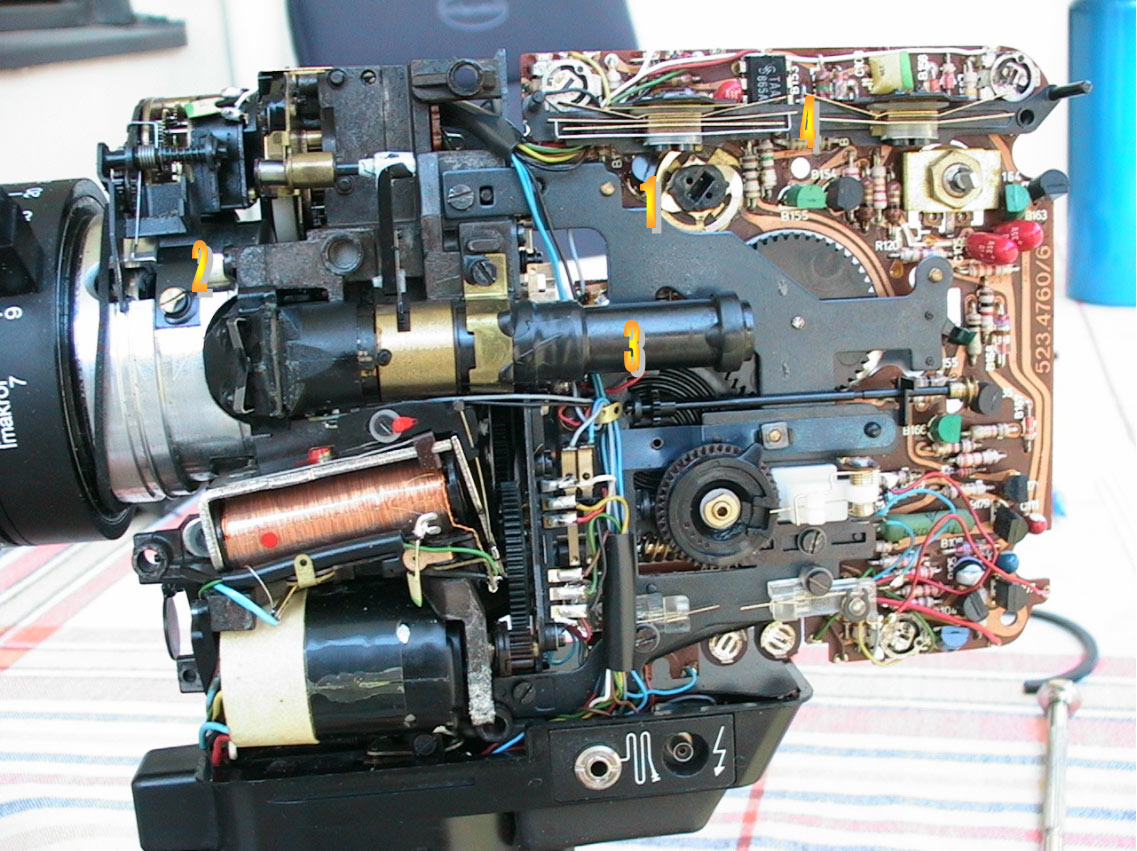
8. The other side of the camera.
- Exposure button
- Lens attachment screw (x3)
- Part of the viewfinder
- Zoom and Manual exposure controls
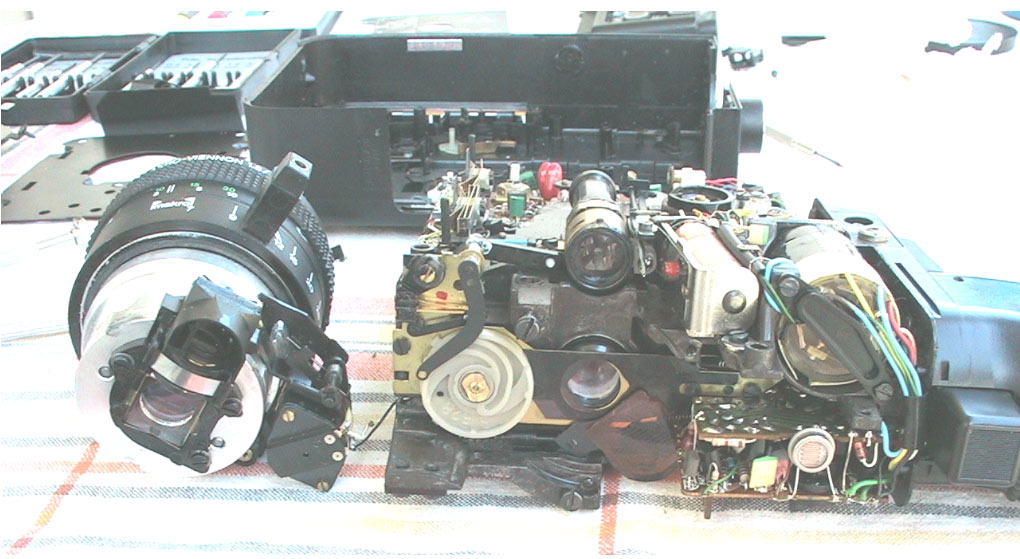
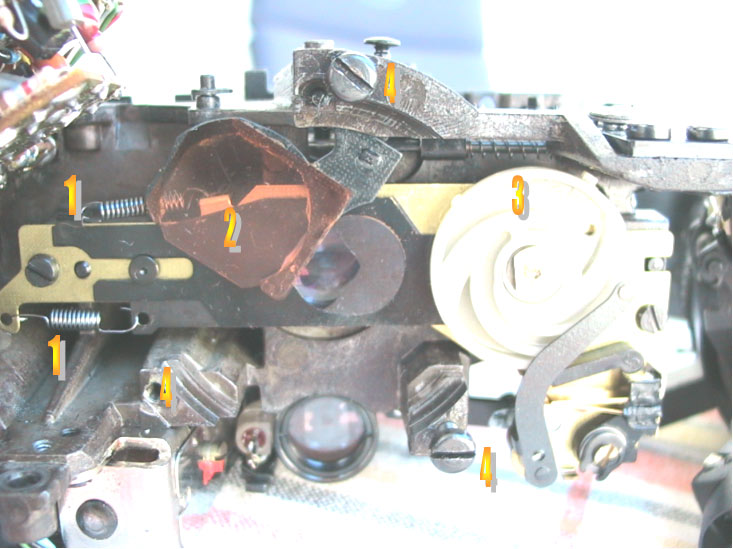
9 and 10. Detail on aperture control and daylight filter
- Springs to open and close the aperture
- daylight filter
- Aperture control wheel connected to motor
- Lens attachment screw
Problem: Aperture will not open/close properly. Stops at f2.8
My fix: I took the spring from the daylight filter (2) (It’s bigger and stronger) and replaced one of the old once. Then I doubled the remaining old spring with the one I took out,(1) and made a new one for the daylight filter from a ballpoint pen.
